How to Install Arch Linux

What is Arch Linux?
Arch Linux is a general-purpose x86_64 GNU/Linux distribution that uses a rolling release model, striving to provide users with the latest stable versions of software. It is known for its principles of “simplicity, modernity, pragmatism, user centrality, and versatility.”
The Arch Wiki clearly states its principles:
Simplicity
Arch Linux defines simplicity as avoiding unnecessary additions, modifications, or complications. It provides software as released by the original developers (upstream) with minimal distribution-specific (downstream) changes.
Modernity
Arch strives to maintain the latest stable versions of software, as long as systemic package breakage can be reasonably avoided. It’s based on a rolling-release system, allowing a one-time installation with continuous upgrades.
Pragmatism
Arch is a pragmatic distribution rather than an ideological one. The principles here are only guidelines. Ultimately, design decisions are made on a case-by-case basis through developer consensus.
User centrality
Many Linux distributions attempt to be more “user-friendly,” but Arch Linux has always been, and will always remain, “user-centric.” The distribution is intended to fulfill the needs of those contributing to it, rather than trying to appeal to as many users as possible.
How to Install
Now we need to know how to install it.
The Arch Wiki already has an installation guide, but it may not be easy to read for Linux newcomers or beginners. Therefore, I’ll write a simple guide here.
System Requirements
Generally speaking, Arch’s hardware requirements are not very high, because the default installation doesn’t include any software (not even vim, wget, or git). However, since users need to install different software, the requirements vary based on actual usage.
Here are some examples based on personal experience:
No GUI:
- CPU: 1.0GHz single-core or better
- RAM: 1GB is sufficient
- GPU: Just needs to display
GUI (LXDE):
- CPU: 2.0GHz single-core or better
- RAM: 2GB or more
- GPU: Just needs to display
GUI (Xfce):
- CPU: 2.0GHz ~ 3.0GHz single-core or better
- RAM: At least 2GB, 4GB comfortable
- GPU: Needs to display + 128MB VRAM
GUI (GNOME):
- CPU: Dual-core 2.0GHz+
- RAM: 4GB sufficient, more recommended
- GPU: Intel integrated with 256MB VRAM is smooth
GUI (KDE):
- CPU: 3.0GHz dual-core preferred, at least 2.6GHz dual-core
- RAM: 4GB sufficient, more recommended
- GPU: Better than GNOME requirements
Emm… In short, as long as it’s a computer, it can run Arch. It’s just that KDE and GNOME might be laggy. As long as it’s not a 486 from the last century, Xfce should be fine.
Preparation
Installation Media
If you’ve installed other Linux distributions before, this part won’t take much time, because creating Arch installation media is similar to other distributions.
If you’ve reinstalled Windows but never tried Linux, you might only need a quick look to understand.
-
Step 1: Download the Arch Linux ISO
- You can download it from the Arch official website or from a mirror site near you.
-
Step 2: Prepare a USB drive
- You need a USB drive to burn the ArchISO. Preferably 8GB or larger.
-
Step 3: Burn the ArchISO to the USB drive
- Windows: I recommend rufus
- Linux: You can use the
ddcommand
Don’t Panic
If you’ve never touched Arch Linux or are a Linux beginner, you’ll inevitably encounter problems during installation. Don’t panic or get anxious. Stay calm and find solutions through various channels. You just need a calm mindset.
Read the Arch Wiki
The Arch team has set up a Wiki for users to consult. When you encounter trouble during installation, the Arch Wiki might help you.
Ready, Set, Go!
Boot the Arch ISO
First, insert your USB drive, then press the specific key during boot to start the ArchISO.
Here are the keys for different brands:
Brand Desktops:
- Lenovo F12 / HP F12 / Acer F12 / Dell ESC / Hasee F12
- ASUS F8 / Founder F12 / Tongfang F12 / Haier F12 / BenQ F8
Brand Laptops:
- Lenovo F12 / Acer F12 / Alienware F12 / Xiaomi F12
- ASUS ESC / HP F9 / Thinkpad F12 / Dell F12 / Hasee F12
- Toshiba F12 / Samsung F12 / IBM F12 / Fujitsu F12
- Haier F12 / Founder F12 / Tongfang F12 / MSI F11
- BenQ F9 / Gigabyte F12 / Gateway F12 / Sony ESC
- Apple: Hold Option key during boot
Motherboards:
- ASUS F8 / Gigabyte F12 / MSI F11 / Biostar F9
- Soyo ESC or F12 / Colorful ESC or F11 / ASRock F11
- Onda F11 / Foxconn ESC or F12 / Intel F12
- And more…
Press the corresponding key, select your USB drive, and boot the Arch ISO.
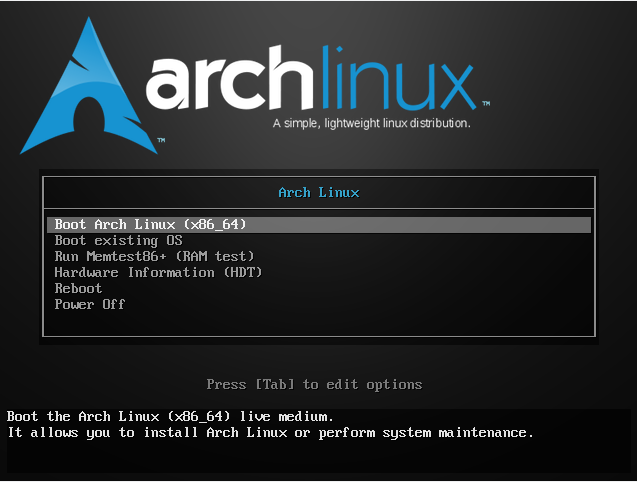
As shown above, after the Arch ISO boots, select the first option and press Enter.
Check Network Connection
After booting the Arch ISO, you’ll be operating a Live CD on tty. The first thing to do is check if you’re connected to the network.
You can use the ping command to verify:
# ping weepingdogel.github.ioIf it returns information like this, your network is working:
PING weepingdogel.github.io (185.199.111.153) 56(84) bytes of data.
64 bytes from 185.199.111.153: icmp_seq=2 ttl=48 time=113 ms
...
If it doesn’t work, you need to check your network interface:
# ip linkSet the network interface up:
# ip link set <interface_name> upUse dhcpcd to automatically obtain a DHCP address:
# dhcpcdSynchronize System Time
Make sure the Live CD’s time is accurate:
# timedatectl set-ntp truePartitioning
This is always a critical part — partitioning.
First, check if your hard disk is recognized:
# fdisk -lIf recognized, it will appear as /dev/sda or /dev/nvme0n1.
Creating Partitions
Scheme 1: BIOS + MBR
| Mount Point | Partition | Partition Type | Recommended Size |
|---|---|---|---|
/mnt |
/dev/sdX1 |
Linux | Remaining space |
| [SWAP] | /dev/sdX2 |
Linux swap | 512 MB or more |
Scheme 2: UEFI + GPT
| Mount Point | Partition | Partition Type | Recommended Size |
|---|---|---|---|
/mnt/boot/EFI |
/dev/sdX1 |
EFI System | 260-512 MB |
/mnt |
/dev/sdX2 |
Linux | Remaining space |
| [SWAP] | /dev/sdX3 |
Linux swap | 512 MB or more |
The Live CD has several partitioning tools: fdisk, parted, cfdisk. I recommend cfdisk — it’s simple to use.
Formatting
BIOS + MBR:
# mkfs.ext4 /dev/sdX1UEFI + GPT:
# mkfs.ext4 /dev/sdX2
# mkfs.vfat -F 32 /dev/sdX1
For swap partition:
# mkswap /dev/sdX2
# swapon /dev/sdX2
Mounting Partitions
Mount the root partition to /mnt:
# mount /dev/sdX1 /mntInstall the Base System
Choose Mirrors
Arch Linux is installed over the network. It downloads necessary installation files directly to the partition via mirror sources.
Edit the file /etc/pacman.d/mirrorlist and put the nearest mirror at the top:
# nano /etc/pacman.d/mirrorlistInstall Essential Packages
# pacstrap /mnt base linux linux-firmwareI recommend:
# pacstrap /mnt base base-devel linux linux-firmware linux-headersAfter a lot of text output, the base system is installed.
Configure the System
Fstab
Generate an fstab file:
# genfstab -U /mnt >> /mnt/etc/fstabChroot
Change root to the installed system:
# arch-chroot /mntTimezone
# ln -sf /usr/share/zoneinfo/Asia/Shanghai /etc/localtime
# hwclock --systohc
Localization
Edit /etc/locale.gen, uncomment en_US.UTF-8 UTF-8, then:
# locale-genCreate /etc/locale.conf:
LANG=en_US.UTF-8Network
Install NetworkManager:
# pacman -S networkmanager
# systemctl enable NetworkManager
Create /etc/hostname:
myhostnameEdit /etc/hosts:
127.0.0.1	localhost
::1		localhost
127.0.1.1	myhostname.localdomain	myhostname
Root Password
Set a root password:
# passwdInstall Bootloader
Install GRUB
Case 1: BIOS + MBR
# pacman -S grub
# grub-install --target=i386-pc /dev/sdX
# grub-mkconfig -o /boot/grub/grub.cfg
Case 2: UEFI + GPT
# pacman -S grub efibootmgr
# mount /dev/sdX1 /boot/EFI
# grub-install --target=x86_64-efi --efi-directory=/boot/EFI/ --bootloader-id=GRUB
# grub-mkconfig -o /boot/grub/grub.cfg
Then reboot:
# exit
# reboot
Post-Installation
Create a Regular User
After installation, it’s not recommended to use root directly. Create a regular user:
# useradd -G wheel -m -s /bin/bash <username>
# passwd <username>
If you didn’t install sudo:
# pacman -S sudoEdit /etc/sudoers and add your username:
root ALL=(ALL) ALL
<username> ALL=(ALL) ALL
Install a GUI
Install xorg and a desktop environment (xfce4 as example):
$ sudo pacman -S xorg xfce4 lightdm lightdm-greeter-gtk
$ sudo systemctl enable lightdm
Install Graphics Drivers
Intel:
xf86-video-intelNVIDIA (open-source):xf86-video-nouveauAMD:xf86-video-amdgpu
Conclusion
Now your system is ready to use! Arch Linux is a great distribution for learning Linux. The installation process teaches you a lot about how Linux works. If you encounter problems, check the Arch Wiki — it’s one of the best resources for Linux information.